Thursday, 13 April 2017

Onstage 2017 Swaps

Last weekend I attended our Onstage Local event at Luna Park in Sydney.
I decided 3 days out that I'd do some swaps, so I set about making a quick bookmark using the beautiful Flourish Thinlits, the Stitched Shapes Framelits and the Layering Circles Framelits.


As usual, it was a production line cutting all the pieces to get ready to assemble.


Those flowers took me ages to do because I made black ones for the front, and cut out the coloured ones for the back - 4 flowers per bookmark, 30 bookmarks.  Do the math......and it's 60 times through the Big Shot!  Thank goodness for Harry Potter.  I watched 3 movies!


My top tip for attaching the flowers to the stitched shapes piece: Get an old embellishment pot (like the ones we get with buttons in them) and put a squirt of liquid glue in the bottom.  Then, using a wedge of a sponge with a bulldog clip handle, dip into the glue and dab it onto the back of the flower.  You get just the right amount of glue without any mess.  And while I love my fine-tip glue pen, it would've been way to slow in a production line task like this one.
Finally, I love the way the bright colours work with black.  And the Wink of Stella....Pow!

Finished result, front and back, packaged into bags with my recipe on the back.  Love!

Now, how about what I got in return........here's a sampling......

This is a tealight gift box from my upline Linda Dalke.  So pretty!

This clever creation is by Vanessa Chivers who credits Gosia Mackinnon's original design.
It's a clever use of the Detailed Floral Thinlits die, containing a battery operated tea light.

And doesn't it cast a lovely shadow? Imagine a bunch of these decorating a table for a  party.

A special treat box containing chocolate easter eggs is the creation of Cath Reed.
 Love the topper using the Foxy Friends stamp set.

This One Wild Ride stamp set looks great with the Brick Wall textured embossing folder as the background.  It looks like Tanya's added some ink before running it through the Big Shot becuase it really pops.  By Tanya Kane

Who doesn't love the Stylish Lady in Beautiful You.  A touch of sparkle from the glimmer paper and the Swirly Bird Thinlits takes it up a notch too, don't you think? By Rosie Spezzano

The Lift Me Up stamp set and co-ordinating Up & Away Thinlits has some great layering oppotunities, thanks Anna Wheaton

Love the copper embossing on this card by Nerida Carter.  And how cute is that little bee? 
Scissor charm by Anna Wheaton - a close up is on my facebook page at
www.facebook.com/PaperLadyKarenCumming

What a great way to showcase a monotone design.  I love everything about this card.  All that texture is so pretty.  Thanks Charmaine Andrews
By Genna Gifford.  Love how she's hand drawn the outline around the flowers and the stitching with a Rich Razzleberry marker 
This cute little holder by Fiona Bradley hold two tea bags.  It would be a nice addition to a letter for a friend.  I know, I said letter, not email, right?!
This one layer card is so effective using Timeless Texture and Balloon Adventures stamp sets,
by Deb Krupa 
By Sandra Lill.  You can't see the detail as well on the photo, but Sandra has wet the paper then added Pacific Point ink and sprinkled some rock salt over the top.  It's made a lovely background.

If there's anything there that you like and want more info, message me and I'll try to help out with the supply lists that came with each swap.

Happy stamping!
Karen


Wednesday, 12 April 2017

Gift Box Punch Board

The retiring list has arrived and there's some great savings to be had.  If you'd like to see what's on the list, click here and take a peek.  But be quick, as stock is only available until sold out, and will all retire for good on 31 May - some items will sell out way before then though.


The Gift Box Punch Board is an ordinary-looking piece of plastic that gives you extraordinary results. You have to see it in action to see how easy and fun it is to make beautiful boxes! Check out this short video and you can make some like the ones we’ve created that are perfect for a birthday or to make someone special—like your mum—really feel special!


The April Host Code for online orders under $250 is FDTHRUVD.  You will receive a special thank you gift from me if your order is between $50-$250.

If your order is over $250 (thank you!) please DON’T use the host code because you will automatically earn Stampin’ Rewards.

Happy Stamping!
Karen

Monday, 30 January 2017

So In Love with So In Love!

This suite of designer series paper, stamps and die cuts from the Occasions catalogue is totally gorgeous!  It features in my February stamp camp, which still has a couple of spots left if you'd like to join us.  Check out the class page for more information


I'd love to see you there.
Happy crafting
Karen

Tuesday, 10 January 2017

Occasions to "Sale-A-Brate"!

While I was on holidays, this happened!
That's right, the new Occasions Catalog is in full swing, and being January that means Sale A Bration is here as well.  And that means FREE STUFF!

Head on over to my Stampin' Up! store to see all the goodies.  I haven't received my stash yet, but I will be playing along here as soon as I do.

Meanwhile, check out the calendar on my class page and book in for your craft fix in 2017.

Happy stamping
Karen

Thursday, 24 November 2016

Online Extravaganza Sale - Oh My Craft!


To purchase these amazing discounted products before the promotion ends, visit my online store here.

There are so many gorgeous items that you'll want to make a list......

Happy Shopping!

Tuesday, 22 November 2016

Stitched from the Heart

How cute are these Framelits?!


And we get to buy them early.........starting now!

But the really cool thing is that there are some current stamp sets in both the Annual and Holiday Catalogues that are a whopping 25% off till the end of November.....woo hoo!

Check them out......


So, get yours today by heading over to my Stampin' Up! store here.
If you're shopping in November, please use Host Code A7VTHE9S

Happy stamping :)

Karen

Saturday, 12 November 2016

Watercolour Words Stamp Set

This gorgeous photopolymer set features in my November technique class.  What's photopolymer? It's a transparent material that makes is easy to line up images for creating unique stamped projects.

I love this set because it is suitable for a lot of different occasions with it's different sentiments.  The font is really lovely, and it has a watercolour feel even when you simply stamp it with ink.

But by adding watercolouring to the images - especially the flowers, you can create something really eye catching - and that's what you'll learn in my class.  Visit the class page for more information.

And while I've got you here, take a closer look at the picture.  This is the cover of the stamp set box that you get when you purchase these stamps.  It shows you which are the best blocks to use with the stamps and this makes gathering supplies so much easier.

So, there you have it, another gorgeous stamp set from Stampin' Up!  Please email me to join in the class, but be quick, there's only a couple of spots left.
Happy Crafting
Karen x

Wednesday, 20 April 2016

Open House!

The annual release of the retiring list signals the end of some of our favourite products.

Come along to my Open House on Saturday 23 April between 10am - Noon.

We'll have a cuppa and a biscuit and send these products off in style.

Bring your catalogue and you will be able to see some of the retiring products and samples if you'd like to order anything before they're going....going......GONE!


If you can't make it on Saturday and would like to order, you can do so on my website here.
Please use Host Code ZMA6WVCY.

Happy crafting
Karen

Monday, 18 April 2016

Lego Birthday Invitations

I'm happy with the way these turned out. 
Primary colours are easy to use and with Lego as the theme it couldn't be simpler. The blocks were made using a 1 1/4" square punch and a 1/2" circle punch. I used Stampin' Up!'s letter and number dies.  The "is" was made by inking up the word with a marker - it's from a saying stamp that's long-since retired.


I also decorated the envelopes because You should never have a plain envelope!

Now, I'm off to make my shopping list so I'm ready when the Retiring List is released tomorrow. 
Happy crafting
Karen

Wednesday, 30 March 2016

Girl or Boy?

Despite being an avid card maker I still don't know why I haven't got the right card for the occasion on hand all the time!!

Sound familiar?

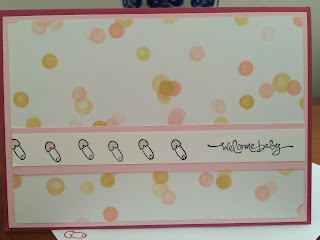
So with some new babies on the way I figured I'd better whip up some lovely little cards - and not dilly-dally on the way!

It's so easy to get distracted by all the pretty, sparkly, new things in the craft room isn't it....

Here's what I did......


The designs grew largely out of the paper I selected.....both of these are retired but were in the same pack of Designer Series Paper.  And that can often make design selection easy because it narrows down the choice of colour and the feel of the card - in this case the colours are pastel hues and as I have inks and stamps that work well with them it makes finishing a project relatively simple.

Hope you whip up something gorgeous today!

Happy crafting!
Karen

Wednesday, 20 January 2016

Sale-a-bration ON NOW!

There's some lovely freebies on offer again this year for our annual Sale-a-bration event.  Go to my website to see the catalogues and products available and remember for every $90 you spend exluding postage, you get to choose a FREE item from the SAB offering!  Wow!

And be sure to check my class page for upcoming classes.......

Hope to see you soon!

Happy Stamping
Karen

Sunday, 13 September 2015

Playing with Christmas Ideas

Just playing with some products from last year and gold embossing.  Love the combo of Whisper White and gold.  The cord is from the current holiday catty and the embossing folder in the last card is the Woodland Textured Impressions.  Lovely, right?


If you'd like any info about embossing, let me know.
Cheers
Karen

Wednesday, 20 May 2015

Labelling Ink Pads

Did you know that Stampin' Up! Classic Ink Pads come with labels so they're easy to identify?


If you're looking at the ink pads like this, then you won't have a problem.  But if they're stored in a whirly-gig thingy then you can't actually tell what's what without removing them from the shelf.

So Stampin' Up! has attached sticky labels to the bottom of the casing.


Simply remove the label and you can choose the appropriate one - or the one you like the sound of ;) -

then adhere it to the end of the case.

Once the ink pad is open, it can be difficult to tell which colour is which, so this little tip came from Convention;  cut the ends off one of the other labels and affix it inside the casing.


That way, if you're using more than one colour at a time (mostly, I know!), you'll not mix up your colours.

Voila!  Enjoy using your labelled ink pads.
Cheers
Karen

Wednesday, 25 March 2015

Competition

Last week's class had a focus on using ALL the stamps in one set.....yes, tricky right?! Well, I issued a challenge to break out a stamp set you've not used for a while (or a brand new one you've NEVER used...haha, like that would happen!), make a project with it using all or the majority of the stamps in the set, and send me a pic. My independent judges will choose a winner and you'll win a prize......the Good Greeting Stamp set is up for grabs.......so get crafty, have a go and send me a pic...you can email/text it or PM me on FaceBook. Good Luck! The sample for inspiration uses Butterfly Basics from Stampin' Up! But you can choose any set, any company any colours. Go for it! 


Competition open to Australian residents only.
Happy crafting!
Karen