Showing posts with label Decorations. Show all posts

Monday, 17 December 2012

12 Days of Christmas - Day 6 Decorated Candle Jars

Hi Everyone

I am really enjoying doing these projects!  I hope you like them too!

This is an easy way to turn your old jars into pretty decorations to fill with candles, tealights, or even coloured stones & sand.

The decorations are all on the outside so safe to burn without the fear of setting the house on fire!  Always a bonus!


This first jar uses up the negatives from the Snow Flurry die.  It's just silver glimmer paper & I've used glue dots to attact it to the outside of the jar.   Blue wide grosgrain ribbon makes a lovely bow, and although you can't see it, there's a candle inside from a previous post.


This jar lends itself beautifully to the Triple Layer Doily punch (R) because it looks like a snowflake when used on the last setting.  Attaching them was tricky.   I first tried vellum adhesive but it wasn't strong enough.  Scratch that!  Then I found my old zyron sticker maker and that worked really well.  For any stubborn bits I used a mini glue dot.  The Champagne snowflakes were punched and cut in half.  Cherry Cobbler seam binding was used for the bow.  If I was doing this again though, I'd use our SU sticky sheets to adhere to the glimmer paper before punching out.  But beware, those triple layer punches are a bit tempermental (aren't we all at this time of year!!) so you might have to try a small piece first.

 
This gorgeous scented burgundy candle was stamped with White Craft ink (R) but you could use Staz On instead.  I've used the tissue paper technigue, details in a previous post.  I love this technique because the candle burns as is.


So there you have it.  A lovely table display for the festive season.

Enjoy your day!
Karen


Saturday, 15 December 2012

12 Days of Christmas - Day 4 Rosette Tree Ornament

I have really enjoyed making ornaments this year and with the one on the cover of the current holiday catty, I've had plenty of inspiration.   However, we don't always have time to make something that detailed, so with that in mind, here's a simpler ornament.

I've used the rosette die (125594) to cut a piece of dsp.   You will have a piece that has two different decorative edges.  You need to cut one of these edges off.  

Because the piece is 12cm wide, if you cut it in half to 6cm you will have the beginnings of 2 rosettes. 


To make your rosette nice and full you will need to cut 2 pieces out so you have a length of 24cm.  You join the two pieces together using sticky strip so it's nice and strong.  Then you form a circle by joining the outside ends together too.


Using your silicone mat, grab your glue gun and put a generous squirt into the centre of the mat.


Then gently manipulate the paper circle thingy into a flat rosette and carefully plop it on top of the hot glue.  Hot glue dries very quickly except when it's in a big blob like the one pictured so you have a few seconds to get it on there.   You'll want to fiddle with the folds to make sure it's even.


Hold it in position for 30 seconds or so until the glue has dried enough to hold the rosette in place.

Then you can go ahead and add a snowflake centre, or another smaller rosette like I've done, a little punched circle and a button.  Yep, sometimes I don't know when to stop.

 
The scallop edge on the rosette is perfect for threading bakers twine through to hang on your tree.
 
Handy Tips:   I mentioned the width of the rosette die as 12cm.  That means it would make a rosette thats 24cm in diameter because each piece you cut makes half the size of the circle (or the radius).  OMG maths!   You would also need at least 2 lengths because the wider the strip, the further it has to go to make a circle.  Confused?  Super!!
 
My finished rosette is 12 cm diameter - so how big are my strips?   If you said 6cm your right!  Go to the top of the class.
 
For the little Old Olive one I cut the strips to 2cm wide to make a finished rosette of 4cm diameter.   I still used two lengths so it's nice and full.
 
Thanks for checking in today!  
 
Cheers
Karen


Thursday, 13 December 2012

12 Days of Christmas - Day 2 Snowflake & Ornament Garland

For today's project I decided I wanted to make a simple ornament garland.


I've done these type of decorations as single ornaments to hang on a tree.  But I like the way it looks as a garland and think it would be fabulous festooned across the ceiling to a centre point, maybe a light fitting or something similar.

Here's what you do:

1.  Ball Ornament: Using the 1 3/4" circle,  punch out about 6 shapes (you can use more but I probably wouldn't use less than 5 because they look better when they're plump!).   Fold each circle in half and use snail to stick them all together.


2.  Use hot glue to attach a piece of cord to the spine of the ornament, then fold the last two sides together and adhere with snail.

3.  For added sparkle, use the Snow Flurry die and Glimmer Paper to cut out a bunch of snowflakes.

4.  Attach them to the cord in between each of your "ball ornaments" using hot glue.


5.  Hang where it makes you happy!


See you tomorrow!
Karen

Wednesday, 12 December 2012

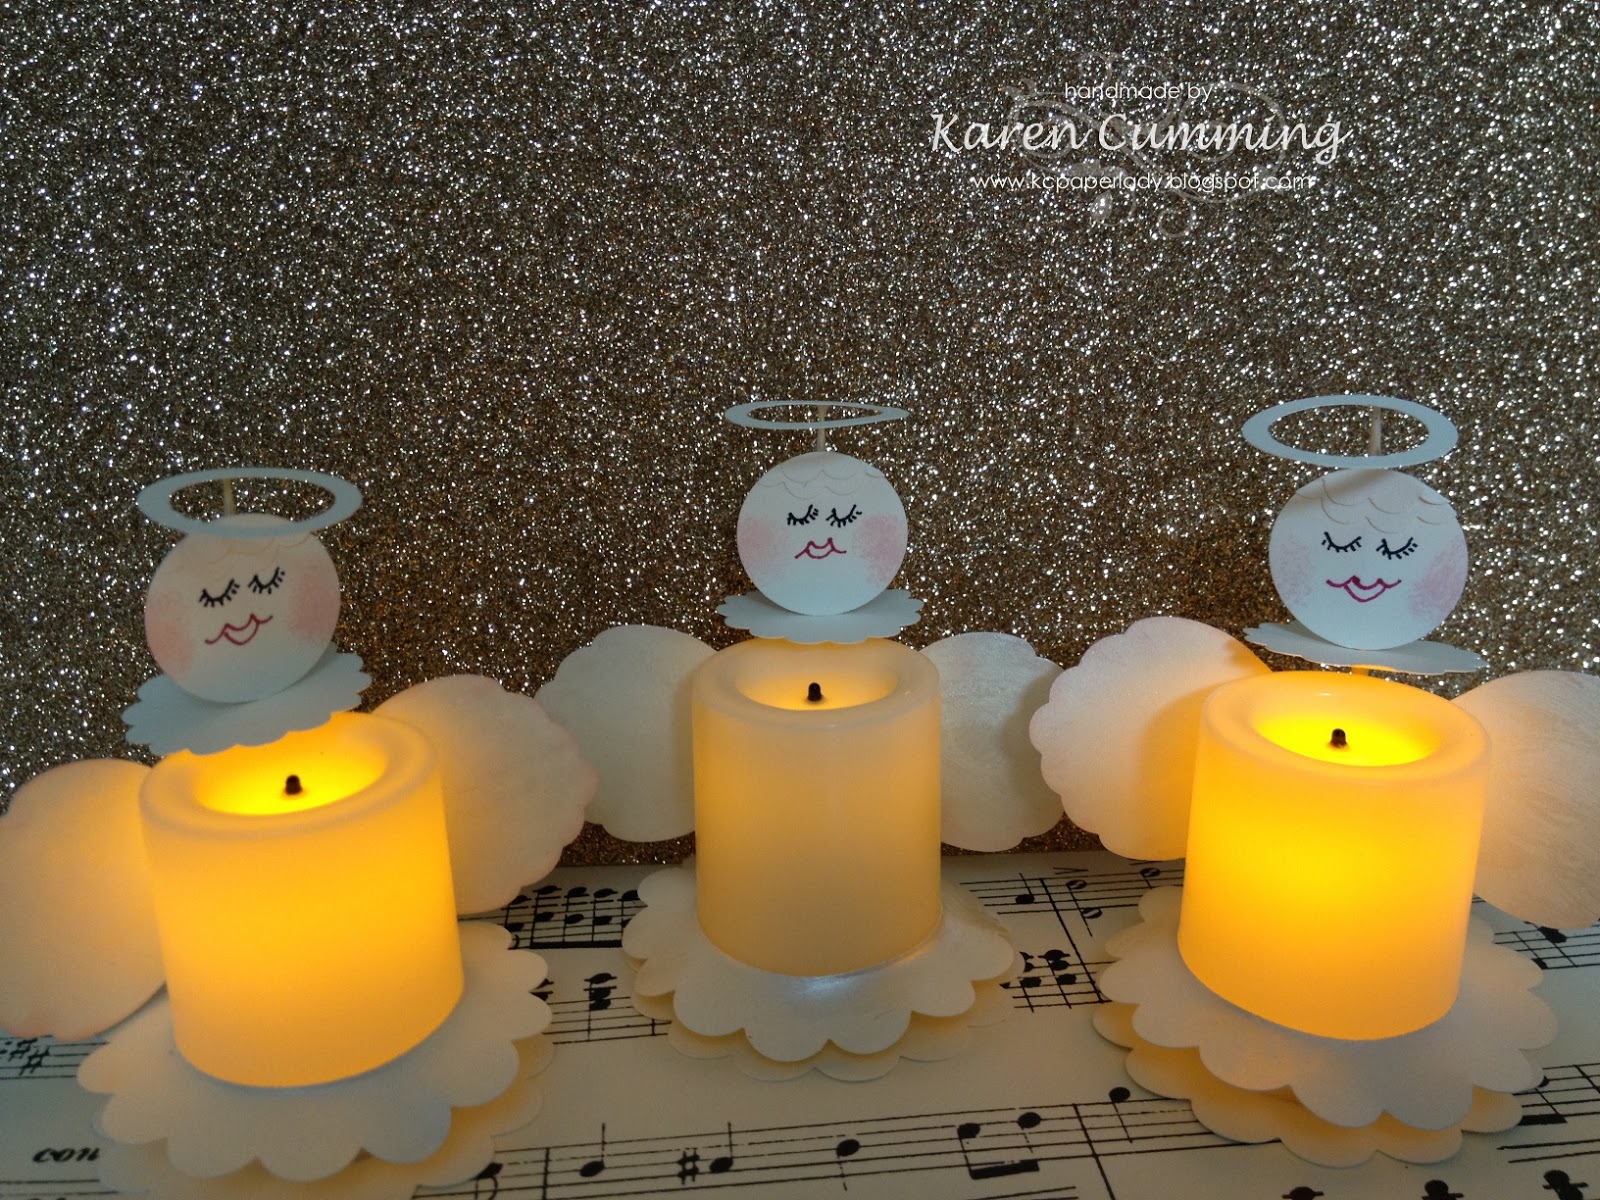
12 Days of Christmas - Day 1 Angel Votives

I've been wanting to do this for a couple of years now, so I'm excited that I'm finally getting on with it! 

My first project is a bit cutesy, a bit crazy and possibly a tad strange!!

I was inspired to do something with these battery operated votives that I bought after I made Becky Roberts' snowman.  

Anyway, they're my take on a votive angel.


Here's what you do:

1. Punch out a 2 3/8" scallop circle. Use the itty bitty punch pack to punch a circle out so you can switch the votive on and off.  Glue it to the base.


2.  Skirt. Punch a 1 3/8" circle, then with the 2 3/8" scallop circle punch over the top so you have a scallop with a big hole in the middle.  Sponge all over with frost white glimmer paint.  Once dry, slide it carefully over the votive to make the skirt.

3. Halo:  Punch out a 3/4" circle then go back over it centreing the 1" circle punch.  Glue this to the very top of a toothpick.  I used Tombow but hot glue would be quicker.


4.  Face:  Punch a 1"circle.  Hand draw eyes and lips.   Use a dauber with pink ink for the cheeks. 
I added hair by attaching a couple of rows of the scallops from the small scallop punch.  Hot glue this to the toothpick just under the halo.

5.  Punch a 1 1/4" scallop circle.   Use the 1/16" punch to make a hole in the centre.  Slide this up the toothpick so it forms a frill around your angel's "neck".

6.  Hot glue the toothpick to the back of the votive.

7.  Wings;  punch two of the largest petals from the blossom builder punch.   Sponge them with glimmer paint and dauber around the edges with Pink Pirouette ink.  Attach them over the toothpick at the back of the votive with hot glue.

Hope you enjoyed this quirky little project.

Be sure to pop back tomorrow for day 2!
Cheers
Karen