Showing posts with label Candles. Show all posts

Thursday, 20 December 2012

12 Days of Christmas - Day 9 Gorgeous Packaging

If you follow my blog you'll know I'm almost as passionate about the packaging as I am about the gift!   And this year we seem to be luckier than ever with the beautiful products we have on offer in the Holiday catalogue.  Now if you're an Aussie, you may not like the use of the word "Holiday" but it's appropriate because there are products for Halloween, Hannukah, Autumn harvest time and Valentine's Day as well as Christmas.  And they're all on sale until the end of January 2013.

Anyway, back to Day 9 and here's some gorgeous packaging ideas to make your gift stand out under the tree.


 This bag is re-purposed.  It's from one of my local stores.  Not now, it's from me!!  I've used the Comfort Cafe DSP again, added the snow flakes & a gorgeous tag from Tags Till Christmas. 

 Yes, I know the Bashful Blue wide grosgrain is retired, but scratch around in your ribbon scraps and you might be lucky enough to find a piece!


My favourite is definitely this box.  For two reasons; first its re-purposed from Stampin' Up! when it held Watercolour Wonder crayons and second because it's now got one of Felicity's amazing soy candles inside!  Actually, I may have to keep it for myself.  No!  I've already been my own secret Santa....twice! 


I'm lovin' the tulle & the Holiday Frame embossing folder looks amazing on the Top Note.  Yum!  Stamps from Joyeus Celebrations are getting a real work out......


.....and that Cherry Cobbler Seam Binding is a breeze to work with, it's hot glued to the inside of the lid so you don't need to use too much.

Lastly, a CASE from the Holiday catty.  Mine's a little different, but the idea is the same.


Bet you wish you came to class last night now don't you?!  Yep, that was one of the projects.

So, it's the 20th folks, get packing!
Want to see a sneak peek of tomorrow's project......
just kidding!
Pop back then!
Karen

Monday, 17 December 2012

12 Days of Christmas - Day 6 Decorated Candle Jars

Hi Everyone

I am really enjoying doing these projects!  I hope you like them too!

This is an easy way to turn your old jars into pretty decorations to fill with candles, tealights, or even coloured stones & sand.

The decorations are all on the outside so safe to burn without the fear of setting the house on fire!  Always a bonus!


This first jar uses up the negatives from the Snow Flurry die.  It's just silver glimmer paper & I've used glue dots to attact it to the outside of the jar.   Blue wide grosgrain ribbon makes a lovely bow, and although you can't see it, there's a candle inside from a previous post.


This jar lends itself beautifully to the Triple Layer Doily punch (R) because it looks like a snowflake when used on the last setting.  Attaching them was tricky.   I first tried vellum adhesive but it wasn't strong enough.  Scratch that!  Then I found my old zyron sticker maker and that worked really well.  For any stubborn bits I used a mini glue dot.  The Champagne snowflakes were punched and cut in half.  Cherry Cobbler seam binding was used for the bow.  If I was doing this again though, I'd use our SU sticky sheets to adhere to the glimmer paper before punching out.  But beware, those triple layer punches are a bit tempermental (aren't we all at this time of year!!) so you might have to try a small piece first.

 
This gorgeous scented burgundy candle was stamped with White Craft ink (R) but you could use Staz On instead.  I've used the tissue paper technigue, details in a previous post.  I love this technique because the candle burns as is.


So there you have it.  A lovely table display for the festive season.

Enjoy your day!
Karen


Wednesday, 12 December 2012

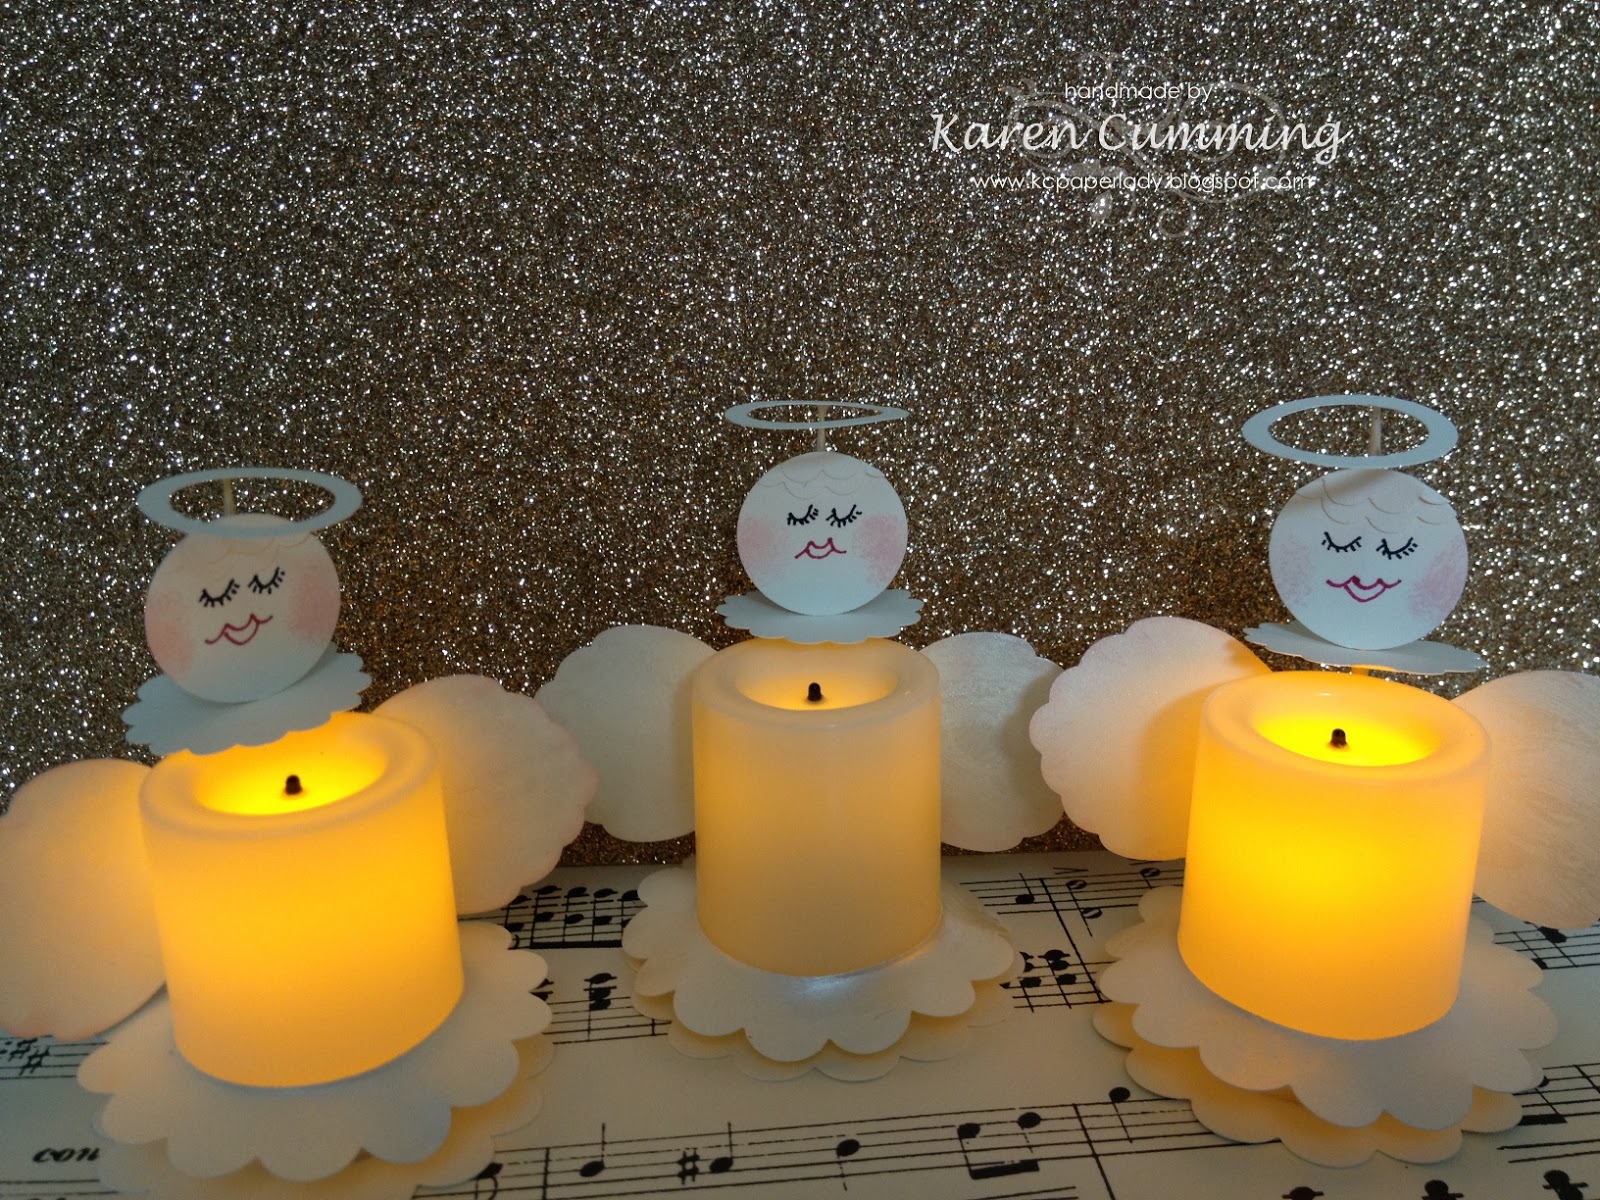
12 Days of Christmas - Day 1 Angel Votives

I've been wanting to do this for a couple of years now, so I'm excited that I'm finally getting on with it! 

My first project is a bit cutesy, a bit crazy and possibly a tad strange!!

I was inspired to do something with these battery operated votives that I bought after I made Becky Roberts' snowman.  

Anyway, they're my take on a votive angel.


Here's what you do:

1. Punch out a 2 3/8" scallop circle. Use the itty bitty punch pack to punch a circle out so you can switch the votive on and off.  Glue it to the base.


2.  Skirt. Punch a 1 3/8" circle, then with the 2 3/8" scallop circle punch over the top so you have a scallop with a big hole in the middle.  Sponge all over with frost white glimmer paint.  Once dry, slide it carefully over the votive to make the skirt.

3. Halo:  Punch out a 3/4" circle then go back over it centreing the 1" circle punch.  Glue this to the very top of a toothpick.  I used Tombow but hot glue would be quicker.


4.  Face:  Punch a 1"circle.  Hand draw eyes and lips.   Use a dauber with pink ink for the cheeks. 
I added hair by attaching a couple of rows of the scallops from the small scallop punch.  Hot glue this to the toothpick just under the halo.

5.  Punch a 1 1/4" scallop circle.   Use the 1/16" punch to make a hole in the centre.  Slide this up the toothpick so it forms a frill around your angel's "neck".

6.  Hot glue the toothpick to the back of the votive.

7.  Wings;  punch two of the largest petals from the blossom builder punch.   Sponge them with glimmer paint and dauber around the edges with Pink Pirouette ink.  Attach them over the toothpick at the back of the votive with hot glue.

Hope you enjoyed this quirky little project.

Be sure to pop back tomorrow for day 2!
Cheers
Karen

Thursday, 13 September 2012

Gifty Things

These are a couple more of the projects I displayed at my catalogue launch to showcase the Summer Smooches Designer Series Paper.


The Journal makes a lovely gift for someone who likes to keep a little note book handy.  Yes, a few of my friends still like paper & a pen!


The flower detail was done using the Big Shot and the Fun Flowers Die.   I love the way each of the flowers are so different but they layer perfectly.  The medallion comes from the Pennant Die.

The bird on the bookmark was made by stamping the image from Betsy's Blossoms.


Candles are favourites of mine to give as gifts.  The larger one was stamped first using the tissue paper technique.   More about this later.     The small one was very simple and just uses a wrap made of DSP and decorated with a frame from the Big Shot, some flowers hand cut and a bit of ribbon.  Of course you have to remove the wrap before burning, but the stamped image is fine and won't set fire to the living room!  Always a bonus.   But don't look too closely, I put the paper on upside down..giggle!


Thanks for looking!
Karen

Wednesday, 11 July 2012

Candle Stamping

Is that like potato stamping?   Do you cut shapes out of candles, press them in ink and stamp them on stuff?    No, you stamp on the candle silly!  Not with your size 7's, just with your rubber stamps and inks!! 

Ok, enough silliness on this Wednesday morning.   I saw this stamping technique on SCS and it sounded quite simple so I thought I'd try it, and you know what? It is!

Basically, you stamp onto tissue paper, cut it out (close to the edge but without worrying about the details).  Then you place the tissue onto the candle where you want the stamped image to be, and wrap it in wax paper.  You need to hold the wax paper tightly so the tissue is held firmly on the candle.   Using your heat gun, heat the image for a few seconds.   The image will quite literally "melt" into the surface of the candle.  Gently peel back the wax paper & you're done.

Here's one I did with the Music Notes wheel.   I actually tried it first and although it was harder to do than the hearts, I was surprised how well it turned out.  


You get the best results with light coloured candles, and should note that the image comes out a little lighter on the candle than it looked when first stamped onto the tissue paper.  SCS recommends white tissue as well.   I might challenge that with some coloured tissue.  I'll get back to you!

Happy mid-week!
Cheers
Karen