Showing posts with label Tutorial. Show all posts

Thursday, 9 September 2021

How to Make A Card Folder

 This week I've been playing with the Free As A Bird stamp set.  When it was first introduced, it had a matching DSP, but as you probably know, Stampin' Up! retires it's DSP at the end of the catalogue and we get gorgeous new papers to play with in the new catty.  That said, this year we got a suite of products called Hand-Penned and I was thrilled to find the DSP goes beautifully with Free As A Bird.  Woo hoo!

I made this cute little card folder, ideal to gift a set of your hand made cards.


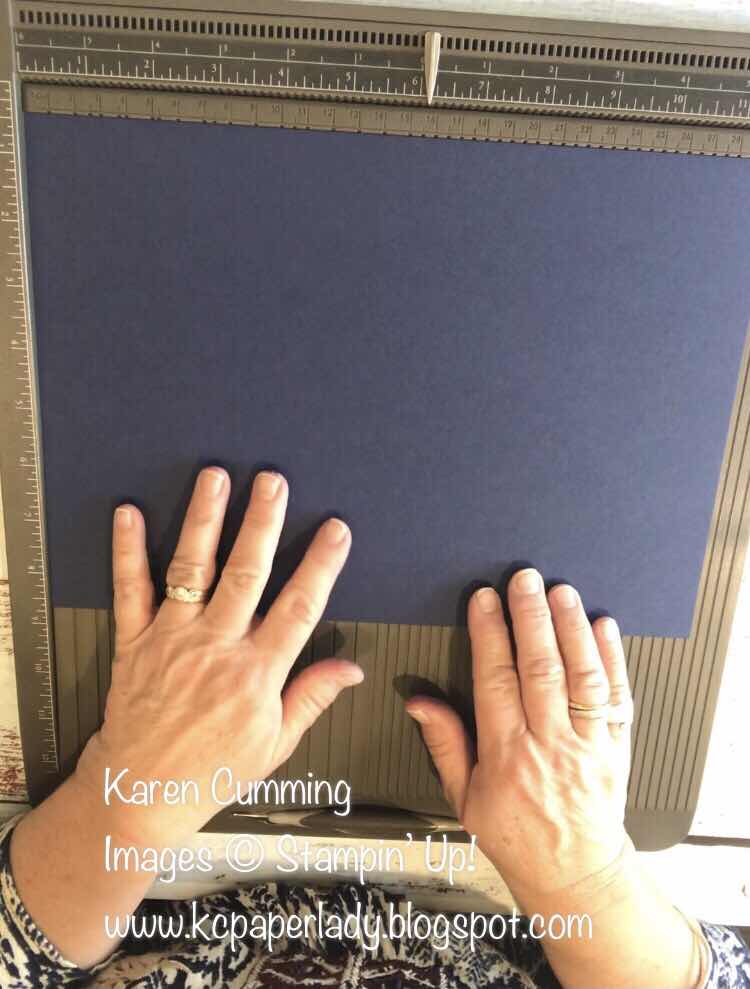
The folder is made from a piece of A4 scored at 148mm in a Landscape format, and turned 90 degrees and scored at 155mm from the right side in a Portrait format.


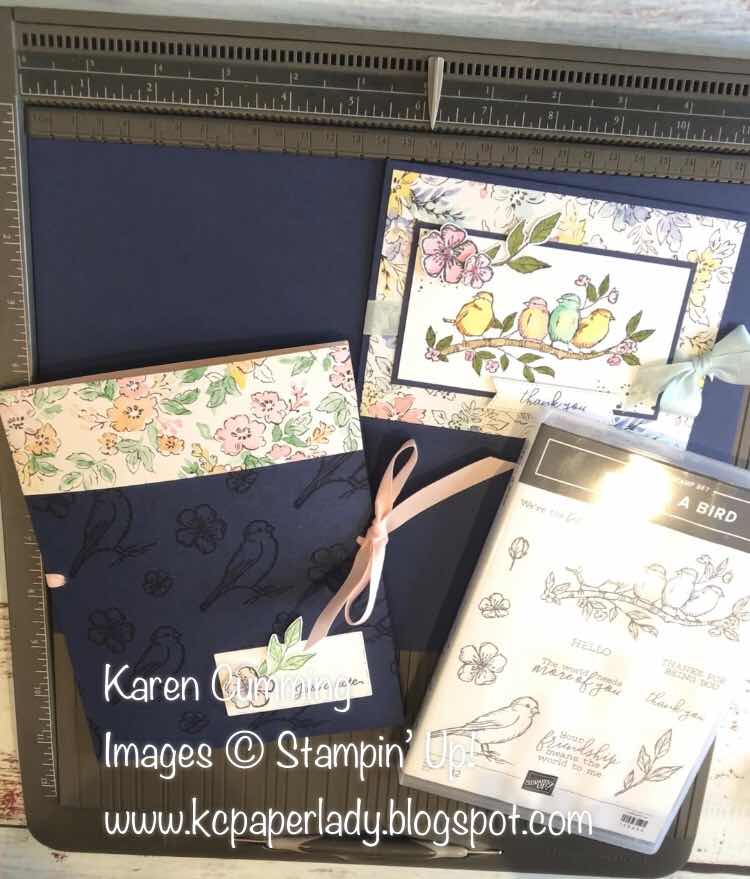
The additional piece of DSP for the top extension measures 297mm x 45mm.

You can watch a video to see how I made the project here.   If you would like to order any of the products I've used in this project, hop over to www.stampinup.com.au and use the current month's host code that you can find on my home page.

Have a crafty day!

Karen

Saturday, 18 January 2014

Playing with Background Stamps

Background stamps are so useful and versatile, but how often do you just pull them out to use as a "background"?

Why not make a feature of them occasionally?

Here's 5 different cards I've made using En Francais.  Order it here.
Each card showcases the stamp in a creative way and hopefully gives you ideas on how to extend your stamps so you get more out of them.

 This card was made using the flourish from Everything Eleanor.  Look closely and you'll see the image is slightly darker in places.  I first inked up the flourish using Pool Party ink, then I inked up En Francais with Marina Mist ink.  I "kissed" the two stamps together and the result is the marbled effect on the flourish.
 This card was made by inking En Francais in Basic Black ink and stamping directly onto Designer Series Paper.  To ensure the stamp shows up well, I chose a paper with a small pattern in a light colour.
 Looks complicated?  Well, it's not!  I stamped En Francais in Real Red onto a piece of Pool Party cardstock.  Then I used my hexagon punch to cut out about 10 or 11 shapes.  Tip:  Pay attention to the direction of the pattern - I wanted all my words to be the right way up!!   Next, I laid each hexagon onto a piece of Real Red card stock that measured 9.5cm x 13.8cm in a diagonal pattern.  I glued them all on with snail adhesive.  Then I ran the whole thing through the Big Shot with the polka dots embossing folder.
 Tags are really in right now and I've started by decorating a plain white one using En Francais inked with Pistachio Pudding.  You can then add any layers or embellishments that you have available.
This last one is a bit harder to see, but En Francais was inked with Black StazOn and stamped onto a window sheet, or piece of acetate - dig out those old OHT's at the back of the drawer! I used Whisper White card stock on the inside to create the note area and it's stuck to the acetate sheet behind the banners.

Note:  Working with vellum and acetate is tricky when it comes to glue.  You can either buy some vellum glue dots - they're quite good, but I don't think you ever get a truly invisible fix.  Or you can choose to add adhesive only in places where you know it will be covered by embellishments - this can be hard to work out at the start because you almost have to design the project backwards.

Anyway, I hope this may give you some ideas for expanding your use of background stamps and hopefully you'll find even more ways to use them once you start playing.

Cheers
Karen


Tuesday, 1 October 2013

Christmas Window Tutorial

I was inspired to make this card by Cindy Hall, one of the design team at Freshly Made Sketches.  It's quite a nice way to use the spruce tree from Lovely as a Tree.


I stamped the trees all over a square piece of card stock that measures 10cm x 10cm.  Some of the trees were stamped without re-inking so you get the feeling of depth.  Then I cut the card stock into 4 squares, each 5cm x 5cm.  Layer them onto a piece of black measuring 12cm x 12cm and you have your "view" in a window frame.

The ornaments were made using the Itty Bitty punch.  I attached them with glue dots so they're not completely flat.  The sentiment is punched out using the Decorative Label and I punched a scallop circle from glimmer paper to add a little mat and give it that extra lift from the frame.  Garden Green card stock cut with the Little Leaves Sizzlit adds an extra bit of greenery - I only cut one branch and snipped it in half because it was a bit big to use whole.

The whole thing is layered onto another piece of Whisper White measuring 13cm x 13cm.  And finally my card base is Cherry Cobbler, 14cm x 28cm folded in half.

Don't forget, when you're making large square cards you need to ensure you either have an envelope large enough for it, or you'll have to make one.  You should also consider the postage cost because non-standard sizes attract more $$.

Have a super day.
Cheers
Karen

Thursday, 5 September 2013

Sweet Moments

Thought I'd do a Mojo Monday challenge this week.  Here's the sketch:

And my interpretation:
The technique on the medallion is called Rock & Roll.   Start by inking your stamp with the lighter colour - in this case I used Crushed Curry.

Then carefully rock &/or roll your stamp on the ink pad with the darker colour, Baked Brown Sugar.  The effect is quite soft and you'll get the different colours showing up according to how much you rocked & rolled!   It's a fabulous technique for medallions and always looks good with circular stamps.

Supplies Used:
Stamp Set: Happy Day
Cardstock: Whisper White, Baked Brown Sugar, Coastal Cabana
Ink: Crushed Curry, Baked Brown Sugar & Coastal Cabana
Paper: Eastern Elegance DSP
1 1/4" square punch
Pretty Print Embossing folder, Delicate Designs Embossing folder & Big Shot
In Color Boutique Details.

Thanks for stopping by.
Karen


Saturday, 20 July 2013

Morrocan Tiles & Stamp-a-Ma-Jig Tutorial

Blue, white & orange make me think of Morocco, and this set lends itself to a tiled look, so here's the result:
This is a pretty intensive stamping session!  And if you want perfect placement, you'll be using your Stamp-a-ma-jig big time!

What is a Stamp-a-ma-jig?   Put simply, it's a stamp positioner.  

It consists of a handle and a perspex imaging sheet:  

You line up the imaging sheet with the right angles of the handle: 

Then line up your stamp also with the handle and stamp your image onto the sheet: 


Next,  place the imaging sheet over your project so that the image appears exactly where you want it: 

Line up the handle with the imaging sheet:

Remove the imaging sheet being careful not to disturb your project:

 Place your stamp into the right angle of the handle and stamp onto your project: 

 Voila, perfect placement:


In this sample, all of the large mosaics were stamped onto Whisper White scraps and punched out with the mosaic punch, then stuck to the Whisper White card layer that was embossed with the Modern Mosaic folder.  The smaller mosaics were stamped directly onto the card stock using the Stamp-a-ma-jig.

The sentiment comes from Hello Lovely (#130243 in clear, #130240 in wood) and was punched out using the Artisan Label Punch (#130920).  I have also punched a label in Pacific Point cardstock, cut it in half and mounted it to the back of the sentiment top and bottom to make it "pop".

What a great way to get tiles without grout!
Cheers
Karen