Showing posts with label Christmas Gift Ideas. Show all posts

Wednesday, 1 October 2014

Weekly Deals - New Today 1 October 2014

This week's deals are below.......
Think I may have to order some of those boxes - they're a great size and you get 3 in a pack....Yay! The finished box is 15.2cm x 15.2cm and 11.5cm high, so it will hold quite a lot of goodies.
 
I decorated this one with a band of Designer Series Paper (Nordic Noel 135822) - I used Snail adhesive (104332) to attach it.  The Fancy Foil Vellum (133363) is a lovely overlay (also comes in stripes and hearts, gold and silver) and our  Burlap ribbon (132140) which makes a fabulous bow.

Call or email me to order, or go direct to my online store here.

Happy Wednesday
Karen

Thursday, 24 October 2013

The Perfect Gift From PaperLady Comes with Options

Finding the perfect gift can be so tricky these days.  Not to mention doing battle with the traffic, the Christmas shoppers, finding parking...the list goes on.

I have the solution for you!

Give a Gift Certificate from PaperLady this year.
 They are available in any amount, have 12 months validity and can be used for my classes or Stampin' Up! product - or a combination of both!


What could be easier?  You can EFT payment and I'll mail it out to you for free so you don't even have to leave home.

Feel free to share this post with anyone who might be looking for the perfect gift for you this year too!
Have a crafty day.
Cheers
Karen

Sunday, 23 December 2012

12 Days of Christmas - Day 12 Neighbour Gifts

It's the last day!   I have so enjoyed this little project expose and I'm already looking forward to next year and finding lots of new things to make and share.

Every year I like to do something with chocolate coins, and this year is no different.  These would make great little stocking stuffers, neighbour gifts or perhaps be a good standby if you need a last minute 'something'.


I've used Ornament Keepsakes to stamp these twice, cut them out with the framelits and use glue dots to stick them to each side of a chocolate coin.  The colours are Cherry Cobbler & gold (doesn't show up very well).  The gold one is heat embossed.

I made the hole in both ornaments together with a 1/8" punch so they line up.

This is an idea I got from my upline Linda Higgins.  Its the larger tag from the Two Tags die.  I've stamped randomly on them and attached ribbon through the slit in the top of the die cut.  The ornaments are from my favourite local gift store, Bella Emporio. 

I wish you and your families a very Merry Christmas & a Happy, Healthy New Year.
You come back now!
Karen

Friday, 21 December 2012

12 Days of Christmas - Day 10 Cookie Decorating Kit

It's Day 10 & I'm thinking about yummy Christmas treats.

Combine that with my passion for snowflakes, and voila!  You've got snowflake sugar cookies all baked and ready to decorate.

We have the most gorgeous cookie stamps and they are really easy to use!
 
 Round treat cups are perfect for sprinkles and they have a self adhesive base that you add a punched scallop circle to.  You'll need the 2 3/4" size.


I've used a small cello bag for the icing.  Stampin' Up! carry a smaller bag which would look better but I didn't get my order in on time!  Oops!  
Then all you need is a cute package.  Brown paper bags are popular this year (Trace!) and I love them with red and white accents, so the snowflake die and my version of Rudolph make another appearance.  The tag is from Tags Till Christmas.
Another gift idea may be to whip up some placemats with our yummy fabric.  I nearly fainted with joy when they brought out the Spice Cake fabric despite the fact that I don't sew!  Yay, thanks SU!  Thankfully my daughter loves to sew.  Pretty good for year 9, don't you think?!
Yes, I'm proud of her talent!
So that's it for day 10. 
Have a super Friday!
Cheers
Karen

Wednesday, 19 December 2012

12 Days of Christmas - Day 8 Teacher Gifts

It's always a challenge to come up with something new and exciting for the teachers each year.

But let's face it, they are inspirational, hard working, incredibly dedicated and already have a cupboard full of soap, mugs & chocolate!  

I hope this inspires you to make something memorable for that cherished person who has so much influence in the lives and futures of our children.


The "apple" may look familiar.  I first made it after Convention this year when Brian Pilling from the SU home office in Utah showed us how.  However, my first attempt was rather more like a pear!  I did this to prove I can make it the right way up!  I do hope you like it.


My second gift is a tin gift card holder. I have used some items from my craft stash that are not Stampin' Up! so I can't name them here. A little embarrassed to admit I bought them when we lived in America so I've had them a while. Always knew they'd be useful!


This is the inside of the tin - before the gift card is added! The letters were done with the Calendar Alphabet & Numbers Set, (R)

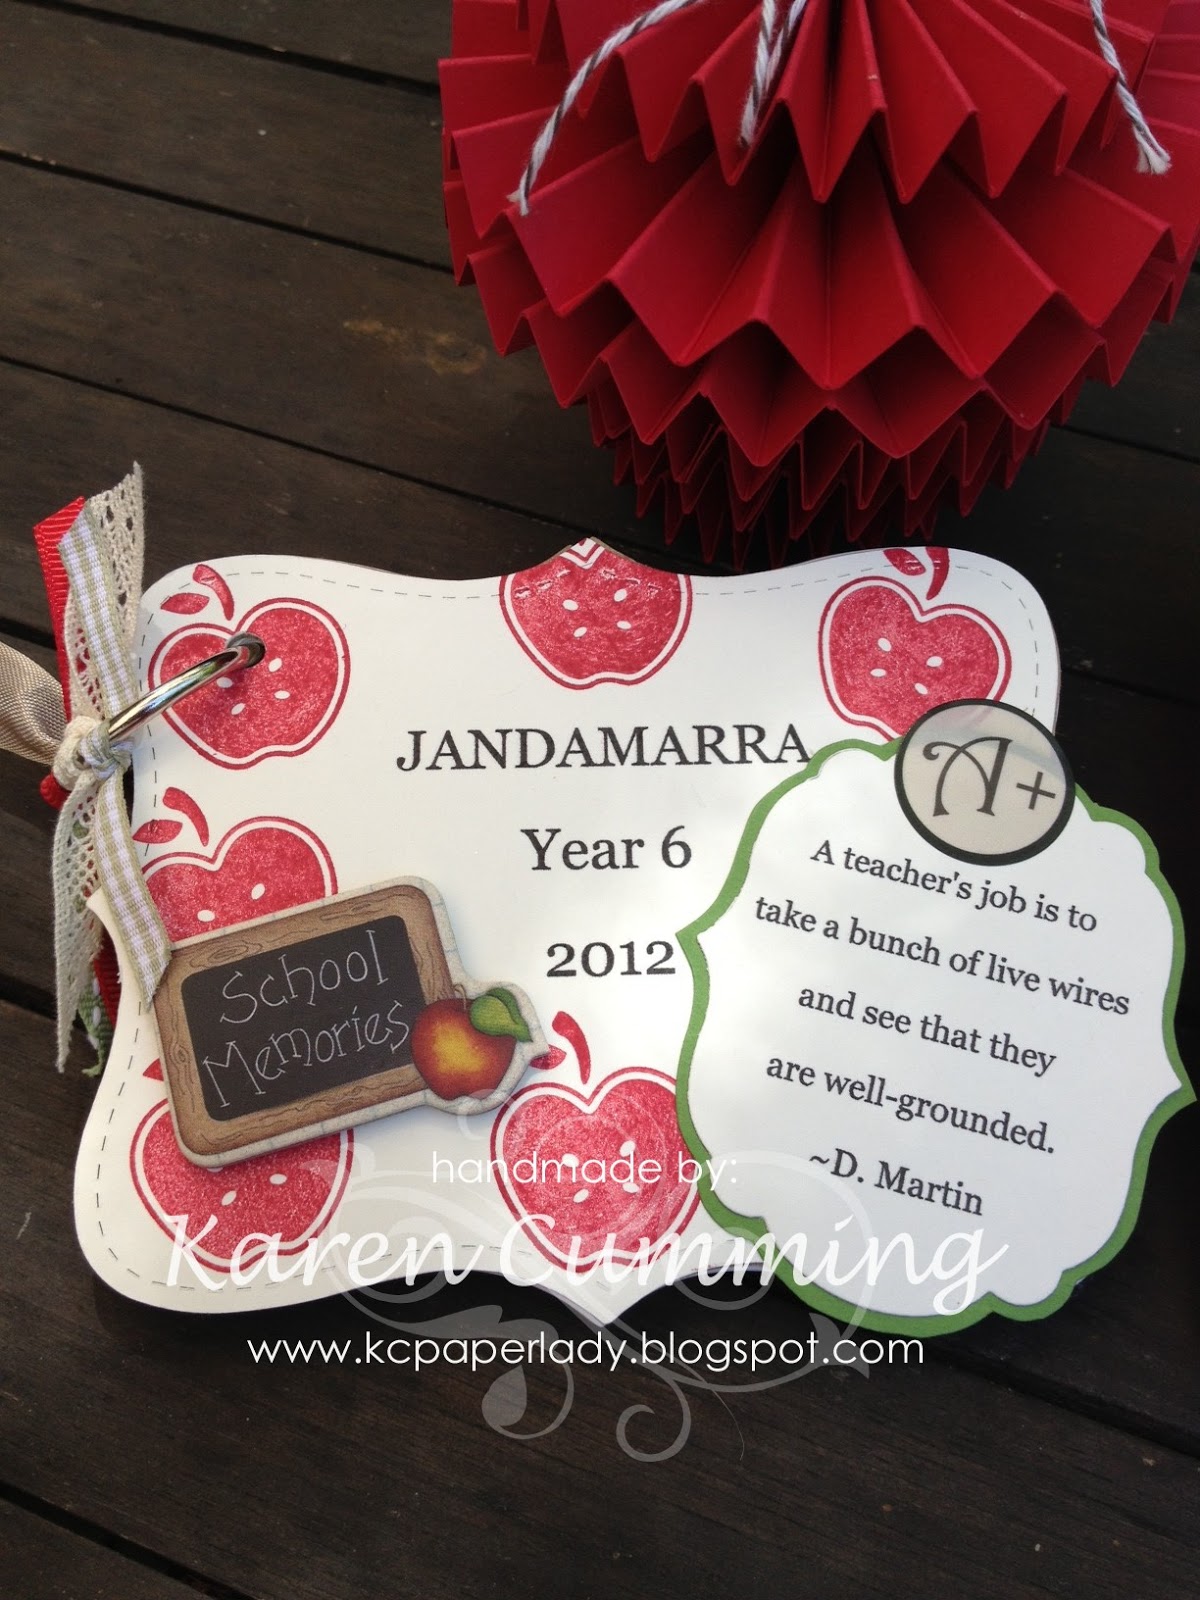
Lastly, a very personal gift.  This is instead of a card.  I had all the children in my daughters class write a special message for their teacher on a Top Note that I die cut and stamped an apple on to.  I hope it will be a lovely memory for her in year's to come.  The front & back cover were made using heavy duty cardboard that often comes in our packs of paper and the like.  I used Sticky Sheets to adhere a vanilla cover and stamped it with apples from the Tart & Tangy set (R).   The framelits are great for the quotes, and all the text was done on the computer. I punched a hole in the top left corner of each page with the Cropadile and an "O" ring holds it all together.     Ribbon in various colours and styles finished it off (all SU, I might add!)

Craft your heart out!
Karen

Saturday, 15 December 2012

12 Days of Christmas - Day 4 Rosette Tree Ornament

I have really enjoyed making ornaments this year and with the one on the cover of the current holiday catty, I've had plenty of inspiration.   However, we don't always have time to make something that detailed, so with that in mind, here's a simpler ornament.

I've used the rosette die (125594) to cut a piece of dsp.   You will have a piece that has two different decorative edges.  You need to cut one of these edges off.  

Because the piece is 12cm wide, if you cut it in half to 6cm you will have the beginnings of 2 rosettes. 


To make your rosette nice and full you will need to cut 2 pieces out so you have a length of 24cm.  You join the two pieces together using sticky strip so it's nice and strong.  Then you form a circle by joining the outside ends together too.


Using your silicone mat, grab your glue gun and put a generous squirt into the centre of the mat.


Then gently manipulate the paper circle thingy into a flat rosette and carefully plop it on top of the hot glue.  Hot glue dries very quickly except when it's in a big blob like the one pictured so you have a few seconds to get it on there.   You'll want to fiddle with the folds to make sure it's even.


Hold it in position for 30 seconds or so until the glue has dried enough to hold the rosette in place.

Then you can go ahead and add a snowflake centre, or another smaller rosette like I've done, a little punched circle and a button.  Yep, sometimes I don't know when to stop.

 
The scallop edge on the rosette is perfect for threading bakers twine through to hang on your tree.
 
Handy Tips:   I mentioned the width of the rosette die as 12cm.  That means it would make a rosette thats 24cm in diameter because each piece you cut makes half the size of the circle (or the radius).  OMG maths!   You would also need at least 2 lengths because the wider the strip, the further it has to go to make a circle.  Confused?  Super!!
 
My finished rosette is 12 cm diameter - so how big are my strips?   If you said 6cm your right!  Go to the top of the class.
 
For the little Old Olive one I cut the strips to 2cm wide to make a finished rosette of 4cm diameter.   I still used two lengths so it's nice and full.
 
Thanks for checking in today!  
 
Cheers
Karen


Tuesday, 11 December 2012

PaperLicious Team Swaps

Here's what I made for my team this year;  


He looks even cuter when the light is switched on but it wouldn't show up in the pic :(
 
The cute little snowman is a CASE from Becky Roberts.  That lady is one clever crafter.  And wouldn't you know it, months ago while in Costco I found a lot of these battery operated tea lights, so a big thank you to Becky for giving me a way to use them!!


As for the box, that's as easy as 1-2-3 with the Two Tags die for the Big Shot, a length of Cherry Cobbler seam binding and some snowflakes from the Snow Flurry Die - my new fave!  The centres are our Dahlia's in Raspberry Ripple & Gumball Green.


The DSP is the Festival of Prints.   I used a piece of Very Vanilla to make the centre part of the box - it measures 6 3/4" x 2 7/8" and is scored at 1/2 inch from each edge (portrait) and 2" from each edge (landscape).  If you attended any of the Heartfelt events this year you would have had something similar as a make n take.

Pop back tomorrow, when my 12 Days of Christmas projects begin!

Cheers
Karen

Friday, 7 December 2012

Who Cares What's in the Package.....

......when it looks this good?!


You can make one of these lovely gift cards at my market stall tomorrow. 

I'll be at North Sydney market next to Stanton library from 9am.    And the community centre is having their open day so you can check out all they have to offer.  Get some lovely food & coffee, and enjoy the festive atmosphere while you do your Chrissie shopping.

Bag a bargain!

Happy stamping.
Karen

Thursday, 13 September 2012

Gifty Things

These are a couple more of the projects I displayed at my catalogue launch to showcase the Summer Smooches Designer Series Paper.


The Journal makes a lovely gift for someone who likes to keep a little note book handy.  Yes, a few of my friends still like paper & a pen!


The flower detail was done using the Big Shot and the Fun Flowers Die.   I love the way each of the flowers are so different but they layer perfectly.  The medallion comes from the Pennant Die.

The bird on the bookmark was made by stamping the image from Betsy's Blossoms.


Candles are favourites of mine to give as gifts.  The larger one was stamped first using the tissue paper technique.   More about this later.     The small one was very simple and just uses a wrap made of DSP and decorated with a frame from the Big Shot, some flowers hand cut and a bit of ribbon.  Of course you have to remove the wrap before burning, but the stamped image is fine and won't set fire to the living room!  Always a bonus.   But don't look too closely, I put the paper on upside down..giggle!


Thanks for looking!
Karen

Wednesday, 5 September 2012

Project Displays

Some of the goodies I made to show at the launch.

I love this gorgeous photo box.  I'm trying to do more scrapbooking...time!  But this was a lovely way to show off some pics and embellishments.   And how cute are the buttons?  

Christmas gift ideas for 2012.   Not sure if you've seen SU's calendar this year, but it's super cute and comes with a display stand.  And who doesn't love a journal or notebook for Christmas?  Do you like the gift tags?  The idea for those came from Felicity's blog.  Check out her amazing work here.

No launch would be complete without a yummy treat or two.  I'm loving the cupcake toppers & that cake banner!