Wednesday 31 July 2013

Big Bows

When Stampin' Up! retired the wide striped grosgrain ribbon I was devastated!  I still love it and think it makes a great focal point on a card.


While this looks like a traditional bow, it's actually not - surprise!  I made a loop and crossed over the ends then used the Antique brad to hold it all together in the centre so it looks like a real bow.

Supplies used:
Stamp Set: Happy Day
Cardstock: Crumb Came, Basic Black
DSP: First Edition (retired)
Wide Grosgrain Ribbon in Basic Black & Antique Brad
Scallop Circle punch - 1 1/4"
The flag ends on the banner are hand cut, but you can also use a square punch, just slide it along the card stock with one corner on an angle and punch.

Cheers
Karen

P.S.  Have you voted yet?  See this post.

Tuesday 30 July 2013

Christmas Stampin All Year Round Challenge 26 Inspiration

I stumbled on this challenge blog and thought how perfect it is to keep me on track year long for Christmas Cards for Australian Armed Forces!

The inspiration for this challenge was a photograph:
 I decided to stick with the red/white colour combo, so here's my card:

While there's a lot of stamping on it, it's still quite a clean looking card.  And I've used the Gorgeous Grunge set.....again....which means it's versatility is ever-increasing.

Supplies Used:
Stamp Set:  Gorgeous Grunge, Snow Swirled (R), Easy Events (R)
Cardstock: Whisper White
Ink: Cherry Cobbler, Old Olive, Staz On Black
Adorning Accents embossing folder and Big Shot
Cherry Cobbler Seam Binding.

I love to read your comments, so please leave one below.
Cheers
Karen

Southern Girls Challenge 74 - Animal Antics

I found this challenge over on the Southern Girls Challenge blog and it really exposed my lack of animal stamps!  Hence, a very modest lizard/gecko offering ;)  

The stamp was coloured using markers to highlight the different areas, then I re-stamped the balloons and cut them out, using dimensionals to pop them up.

Supplies used;
Stamp Set: Tag It
Cardstock: Whisper White, Certainly Celery
Ink: Rich Razzleberry, Bashful Blue, Certainly Celery
Paper: Basics Patterned Stacks in Rich Razzleberry, Bashful Blue, Certainly Celery
Polka Dots Embossing Folder, Labels Framelits & Big Shot
Paper Piercer & Mat
Sponge

Thanks for looking!
Cheers
Karen

Mojo Monday 304

This weeks Mojo Monday sketch is round or square.  This means you can choose your shape preference - often good to get you out of your comfort zone, yes?

I've opted to stay in my comfort zone today with this card;


I've done some sponging in black around all edges included the punch circle.  The clock, face and hands were stamped using the Stamp-a-ma-jig for perfect placement.  Check out this post for a quick tutorial if you'd like to learn more about layering your stamping images so they are perfectly aligned.

Supplies used:
Stamp Set: Clockworks, Gorgeous Grunge & Teeny Tiny Sentiments
Cardstock: Very Vanilla, Marina Mist
Ink: Black Staz On
Paper: Soho Subway DSP
Punches; 2 1/2" circle, Word Window, 1/8" circle
Distress tool, sponge
Black Brad

Thanks for looking!
Cheers
Karen

Origami Paper Dress Card

I love working with old book pages and when I saw this origami fold dress I decided to have a go.


I'm not good at origami and my folds never seem to work out just right - there's usually one side or edge that doesn't match or looks a little wonky!  But this actually came out quite well (I did re-fold it a couple of times though....giggle).

Supplies Used:
Stamp Set: Sweet Essentials
Ink: Early Espresso
Cardstock: Baked Brown Sugar
DSP: Soho Subway
Paper: old book pages
Ribbon scraps
Pearls Basic Jewels

If you'd like to try this technique, check out this link.

Cheers
Karen

P.S.  are you up for a little guessing game?  Check out my post from a few days ago and leave a comment on that post with your vote for the card you think will be chosen.


Monday 29 July 2013

Pals Paper Arts PPA165

If you want to avoid Monday-itis I highly recommend that you go make something!  And if you don't know what to make, hop over to a site like Pals Paper Arts where there are all sorts of challenges to get your crafty on!

Here's this weeks sketch:
And here's my card for the challenge:

I don't do many shaker cards so I'm quite pleased with the way this one turned out.  And the Chalk Talk stamp set and co-ordinating framelits lend themselves perfectly to this technique.

Supplies Used:
Stamp Set; Chalk Talk
Cardstock: Bermuda Bay, Whisper White
Ink - Bermuda Bay & StazOn Black
DSP - Naturals Composition Specialty
Punch - Scallop Trim Border & 1 1/4" Circle
Framelits - Chalk Talk
Pearls Basic Jewels
Window Sheets & Shaker Frames

Happy Monday
Cheers
Karen

Saturday 27 July 2013

Wedding Cards

I was asked to make a wedding card for a Grandmother to give her grand-daughter on her special day.   She gave me a brief  but I couldn't decide which I liked best, so thought I'd let her choose.

Here they are:

This first one is a CASE from a card I saw on Pinterest by Amy O'Neill.  You can find her card here.
I love the elegance of this card and particularly the dyed flowers - I used Perfect Plum.


I got the idea for this on Pinterest also, but have changed it quite a lot.  The original was created by Daniela Sucker from Germany but I can't link to it because it was on an internal Stampin' Up! blog.  Sorry!
It uses the Floral Framelits - the largest one to make the base of the card.    The combination of Elegant Eggplant & Crumb Cake is lovely, and it's nice to make a different shaped card.

 Lastly, this card uses the envelope as a unique way of showcasing the card.


You use the "Mr & Mrs" frame to pull the card up out of the envelope.  The grandmother is known for loving violets and wanted flowers incorporated so this one has that little extra something inside.

I don't know which one she'll pick, so I'll pop back and let you know when she does.  Which one do you think she'll pick?  How about we have a little competition?  Vote here in the comments and the winner will get a gift from me!

Cheers
Karen

Friday 26 July 2013

You Make Me Happy!

Yes, you do.  Especially when we craft together!  What better way to spend time than making something pretty that you can give to brighten someone's day.
Today's card is a very simple design, and I imagine I could use all my Itty Bitty punches similarly - some Christmas tags would be really easy with the tree & ornament, don't you think?

Anyway, back to this card - the most challenging part was punching out the heart in the centre of that little one inch square!  Yeh, who knew?!

The stamp is from Hello Lovely, stamped in Cherry Cobbler to match the Glimmer Paper.  My ribbon is Real Red so while it's a bit brighter than the CC I think it works ok.  I seem to be doing more of the white on white layering but it frames the card nicely and just adds that extra dimension.

Happy Friday!
Karen

Thursday 25 July 2013

Wrapping Special Presents for Special People

Do you like to wrap your presents and make them "special" for each gift you give?  I do!  And the best thing about that is you can co-ordinate your wrapping with your cards & tags too!  Yay, love that.

Here's a really easy way to personalise your gifts using brown paper (I love to re-use the packaging paper that comes with my Stampin' Up! orders), wheels and custom-made tags.


This wheel is called Travel Journal (#126937) and can be used on it's own as I've done here, or as part of our builder wheels where you can put 2 or 3 designs together in one jumbo handle.  The tag was made by cutting a rectangle using Night of Navy cardstock with a layer of Crumb Cake, also stamped with the wheel. I hand cut the corners off - measure if you want it to be even....giggle.  Soho Subway DSP adds a bit of pattern and colour as well as the Postage stamp from Postage Due that was cut out using the Postage Punch. A clay flower makes a cute embellishment and I put a drop of So Saffron ink on it before I blended it and pressed it into the mold.  I didn't mix it thoroughly because I wanted a marbled effect.  Punch a hole in the top of the tag and add some scraps of ribbon, and ta-da you're done.

Happy wrapping!
Karen

Monday 22 July 2013

C.A.S.E.-ING Mosaic Madness

Here's a couple of cards that I've CASED (Copy and Share Everything) from Split Coast.   I can't remember who they were originally made by but if you search Mosaic Madness at Split Coast Stampers I'm sure you'll find them.

 The Designer Series Paper in  this one is from the Quatrefancy Specialty pack (#130141).  It's so pretty that I gave it all away at my catalogue launch so I think I'll have to buy some more!  The card base is our new In Colour Strawberry Slush.

This card may possibly be one of my favourites EVER!  I love the way the punched sections show the colour of the layer beneath.  Very clever, don't you think?   Also like the colour combo of Soft Suede, Calypso Coral and Bermuda Bay.

So after the last few posts on this stamp set, I hope it's given you some ideas of how you can use your Mosaic Madness products.  And if you haven't got them yet, email me now to order yours or simply hop onto my website via the SHOP NOW button at the top of my blog.

Have a super day!
Cheers
Karen

Saturday 20 July 2013

Morrocan Tiles & Stamp-a-Ma-Jig Tutorial

Blue, white & orange make me think of Morocco, and this set lends itself to a tiled look, so here's the result:
This is a pretty intensive stamping session!  And if you want perfect placement, you'll be using your Stamp-a-ma-jig big time!

What is a Stamp-a-ma-jig?   Put simply, it's a stamp positioner.  

It consists of a handle and a perspex imaging sheet:  

You line up the imaging sheet with the right angles of the handle: 

Then line up your stamp also with the handle and stamp your image onto the sheet: 


Next,  place the imaging sheet over your project so that the image appears exactly where you want it: 

Line up the handle with the imaging sheet:

Remove the imaging sheet being careful not to disturb your project:

 Place your stamp into the right angle of the handle and stamp onto your project: 

 Voila, perfect placement:


In this sample, all of the large mosaics were stamped onto Whisper White scraps and punched out with the mosaic punch, then stuck to the Whisper White card layer that was embossed with the Modern Mosaic folder.  The smaller mosaics were stamped directly onto the card stock using the Stamp-a-ma-jig.

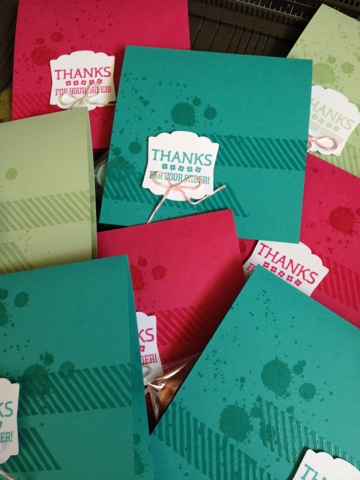
The sentiment comes from Hello Lovely (#130243 in clear, #130240 in wood) and was punched out using the Artisan Label Punch (#130920).  I have also punched a label in Pacific Point cardstock, cut it in half and mounted it to the back of the sentiment top and bottom to make it "pop".

What a great way to get tiles without grout!
Cheers
Karen


Thursday 18 July 2013

Clean & Simple with Mosaic Madness

This set looks like it's going to be extremely popular.  There are many samples appearing online and as I was fortunate to receive it as a freebie, I have been experimenting.

Here's a very simple design to start with:
The colours are Whisper White, Basic Black & Cherry Cobbler.  Once again Stampin' Up'!s product co-ordination comes into play as the stamp set Mosaic Madness (#130249 in clear or #130246 in wood) teams with the Modern Mosaic embossing folder (#129984), and the Mosaic punch (#131267).

As an added bonus you can bundle the stamp set & punch and save money! And it's available in Wood (#132734) and clear mount (#132733).

I'm a big fan of cute little embellishments and the Dahlias are so so so cute!  This little one is in Primrose Petals - an In colour - and comes in a pack that includes Gumball Green, Midnight Muse, Raspberry Ripple & Summer Starfruit (#127556).

The Celebrate stamp is out of Sketched Birthday(#130426 in clear or #130423 in wood).  And it co-ordinates with the Bitty Banners Framelits dies (#129267).

Watch out for more of this lovely stamp set/folder/punch combo!
Cheers
Karen

Wednesday 17 July 2013

Creative Elements with Heat Embossing

I love the look of clear embossing on coloured cardstock, and it works particularly well on darker colours.
This card uses the stamp set Creative Elements (#128523 in wood, or #122647 in clear).  Each image was stamped in Versamark ink (#102283) then covered with clear embossing powder (#109130) and heat set using the heat tool (#129056).  The card stock is Chocolate Chip (#108599) and I've used Very Vanilla (#106550) for the Happy Birthday (from Memorable Moments stamp set #126682 in clear or #132039 in wood) which was cut out using the Labels Framelits (#125598).

The Designer Series Paper (DSP) is from a new pack called Soho Subway (#130140).  There are some great patterns in the pack and it could easily be used for male & female cards as the patterns and graphics are interchangeable.

Punching butterflies is easier than ever with the Elegant Butterfly punch - I've snipped off the little ends from the wings because they got in the way of the sentiment, and the banner is hand cut from a scrap of Chocolate Chip card stock.  

Lastly, I made a flower using Simply Pressed Clay (#130685), died with re inker (Soft suede maybe??)

What do you think?   Feel free to comment below!  I love to hear your thoughts.

Happy Wednesday.  Hope you are enjoying the unseasonal warmth.
Cheers
Karen

Friday 12 July 2013

Splodges & Splats with Gorgeous Grunge

Gorgeous Grunge looks lovely embossed......what do you think of these monochromatic thank you cards?   These are Melon Mambo, Bermuda Bay & Pistachio Pudding.  All the embossing was done in clear and the Thanks stamp comes from our demo only set Workshop Words.  My favourite bits are the splodges and splats!   Have a great weekend!

Wednesday 10 July 2013

Convention 2013 Make & Takes

Just a quick post this morning with a couple of pics of the make & takes I did at Convention this year.


The first one is a card and uses the new stamp set Gorgeous Grunge.  This is a fabulous set for layering and I can see lots of background possibilities for it with the different patterns & textures.  The greeting is from Hello Lovely, as is the ampersand.  And those cute new lacy vintage buttons are definitely going to be popular!

No card is complete without a stamped envelope!


These are our new boxes from the Tag a Bag range.   I mentioned in a previous post that they come in a pack of 8 including acetate sleeves.  But on this one, we added a cardstock cover before slipping the acetate sleeve over the top.  A great idea if you want the contents to be a complete surprise.   Do you like the little "leaves"?  They are oval punched shapes folded in half and snipped with scissors.

Have a great mid-week and go make something gorgeous!
Cheers
Karen

Monday 8 July 2013

Simple Party Invitation

When you're making invitations, it's all well and good to go all out, but the reality is that you're usually making quite a lot of them.

Here's a quick and simple idea, with a bit of style, if I do say so myself!

 I've used our lovely envelopes in Whisper White.  Start by sealing one closed and then cut the end off to make a pocket.   I've decorated the bottom using the Very Vintage jumbo wheel in Basic Black.


The satin ribbon is tied with a classic knot.  Don't forget to snip your ends on an angle.

Use the Apothecary Framelits and centre the right one (see pic) on the open top of the envelope then run it through the Big Shot so that you cut out half the depth of the framelit.

The insert is made using a piece of Basic Black cardstock 13.5 x 10.5cm. Stick a layer of Whisper White cut to 13 x 10cm over the top.  I've stamped the bottom of mine with the wheel but without reinking so it's a bit lighter.

The "You're Invited" stamp is from the Sketched Birthday set.  And I've cut it out with the Big Shot using the coordinating Framelit from the Apothecary Accents set.  It's stuck to the top of the insert with dimensionals.

You can pre print your invitation details onto the white cardstock before you wheel it, or if you have nice hand writing, just do that!

Hope you get to create today!
Cheers
Karen

Friday 5 July 2013

My Digital Studio Expose

Grab a cuppa, I'll wait,  this is a long post!

This year at Convention, My Digital Studio was a major feature.  As you'd expect really, given that it's a whole new product in our market, and offers so many possibilities for the digital paper crafter as well as great hybrid options for the more traditional amongst us.

For those that don't know, My Digital Studio or MDS, is a software package that allows you to create paper craft projects digitally.  The package is inexpensive at $24.95 and comes with a lot of templates, papers, punches and embellishments.  AND you can purchase all sorts of downloads that are in line with current (and retired!) Stampin' Up! product that includes stamp sets, text, the list goes on.

I thought I'd share these samples that I purchased in Memento Mall (our SU shopping opportunity for logo and marketing merchandise).  They are a great example of the kinds of things you can do with MDS.

Free standing desk calendar

Every month is different

Like the font and design of July

Christmas Card.  Love this!  Imagine how easy it will be to make all your cards this year!

Flip book of your travels?  What a great way to share your holiday without boring everyone with a massive album!
And it fits in your handbag!
I love this wall art piece.  This sort of look with all the different fonts and the black and white colour scheme is really trending right now.  Imagine being able to change it up to suit your decor.

This is a hard-back recipe book.

I love that you could create a gorgeous recipe book and start a family tradition.

Invitations created simply, and easily

The tri-fold design is lovely with a photo of the happy couple included.

This last one is a card created by New Zealand Demonstrator Sharlene Meyer.  I've included it because it's a great example of a hybrid card;  a blend of digital & traditional.   The sentiment panel was created on MDS but Sharlene has used the Decorative Label to punch it out.  She's also added Baker's twine in Calypso coral.  Again, the colours, stamp sets, papers, punches etc all co-ordinate in the digital and traditional world.  
So there you have it.  Can you see the possibilities?  I don't think that either medium needs to be mutually exclusive, but I do like the idea of creating my scrapbooks digitally because I am so time poor, despite loving traditional methods!

Currently, if you create projects in this way you can print them at home, or take them to Officeworks or similar (more cost effective).  Stampin' Up! are working to find a print partner that will ultimately make it even easier to use this great new software.

If you would like to try before you buy, you can download a FREE 30 DAY TRIAL here.

Happy creating!
Cheers
Karen